- Home
- Doll Sewing Tutorials
- Pyjama Sewing Tutorial
A Pyjama Sewing Tutorial: How To Sew PJs for Pru
Here is a step-by-step pyjama sewing tutorial about how to sew a set of pyjamas for Tonner doll Prudence Moody. They are fairly easy to construct and do not require putting in a lining. I used very light-weight Liberty of London cotton lawn fabric, which comes in lots of pretty patterns. I used to order fabric from sellers on eBay, but since then, I’ve found a lot of sellers now sell really nice fabric on Etsy. Do a search and see what you can find!
Here is the pattern I used, available from the Fletcher Pattern Company. It is called Slumber Party for Ellowyne. We will be making the pyjamas.
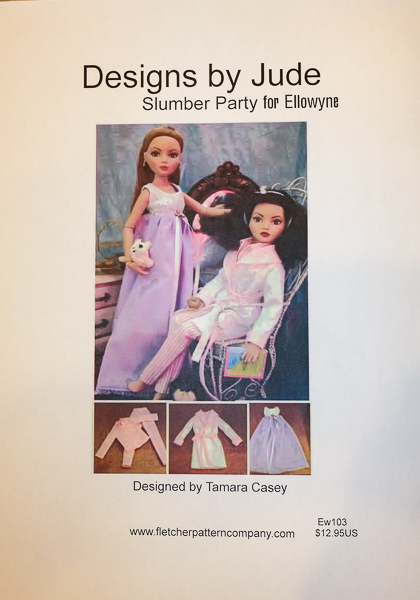 Designs by Jude Slumber Party Pattern
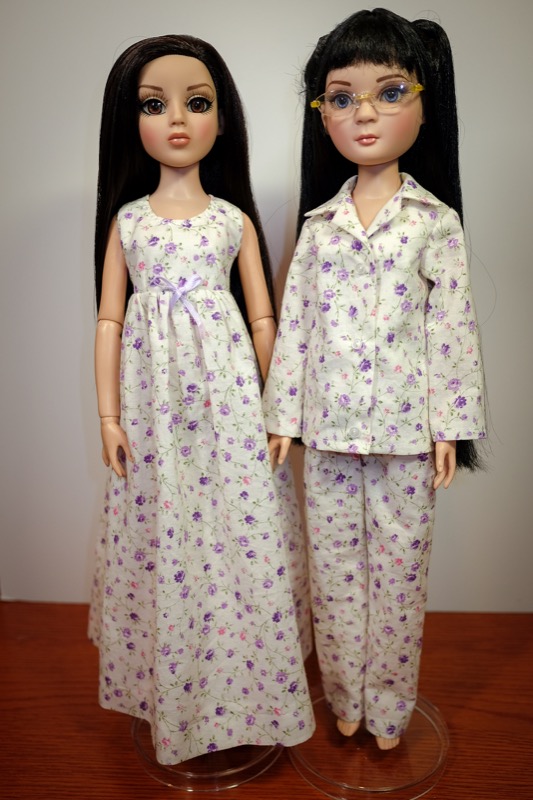 Here is the nightgown and pyjamas completed. We will be making the pyjamas.
Pyjama Sewing Tutorial Supply List:
- sewing machine
- straight stitch foot (quilting foot) for your sewing machine
- straight stitch plate for your sewing machine
- fabric shears
- small scissors
- thread snips
- pinking shears - optional
- thread (I used Aurifil thread - I like this brand because it is very fine)
- suitable fabric
- universal sewing machine needles 80/12 or 70/10. I used 80/12
- hand sewing needles. I used a sharp #10
- fine silk pins
- marking tools (I used a Frixion pen)
- 3 small buttons for the pyjama top
- 3 small snaps (press studs) for the pyjama top
- 4-inches of 1/8-inch elastic for the bottoms waist
- your doll sewing pattern (I used one from Fletcher Pattern Company)
How To Cut Your Fabric and Begin
To begin, you need a flat surface to cut out your pattern. I used my kitchen counter. You don’t needs oodles of space to cut out doll patterns!
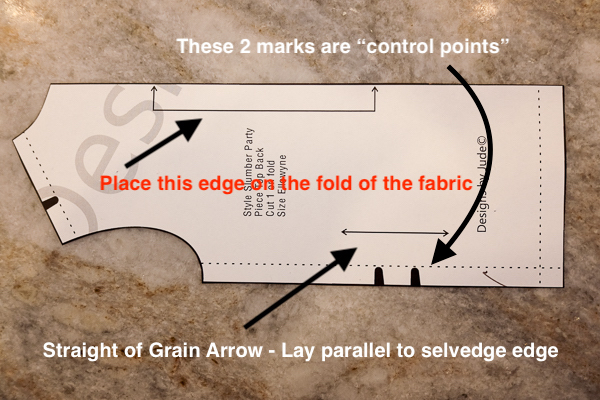 Back pattern piece, showing important markings. The Straight of Grain arrow goes parallel to the fabric edge. The other arrow goes right on the fold of the fabric. Mark the Control Points so you can match this pattern piece with the front so sew it together exactly.
Pre-wash your fabric and iron it carefully. The pattern pieces will tell you how many pieces to cut out for each pattern piece. Often, I fold the fabric in a double layer so I can cut out two at once. Fold the fabric so the two selvedge edges meet. You will put the back piece along the fold of the fabric. Be sure to cut out only one collar and one back for this particular pattern. All the other pieces need two fabric pieces each cut.
I lay the pattern pieces on the fabric, using a minimum of silk pins to hold them down. Be sure to line up the “Straight of Grain” arrow with the selvedge edge of the fabric. Otherwise, the garment may twist with use! Trace around each pattern piece with a marking instrument - I used a Frixion pen. Test your fabric to be sure the marks will come out! Frixion pen marks come out with a hot iron and I’ve had no issues with that on cotton.
Mark any “control points” after you cut - these are needed to make sure you can fit the pieces together accurately as you sew them. I often use a tiny snip into the side of the piece, no more than 1/8-inch long. Be careful! you don’t want to snip into where the seam line sewing will go!
Now you are ready to sew!
Pyjama Sewing Tutorial: The Pyjama Top
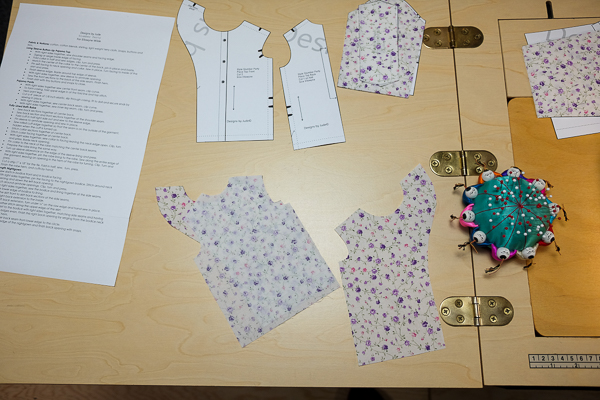 1. Begin the Pyjama Sewing Tutorial: here are the pieces for sewing the top.
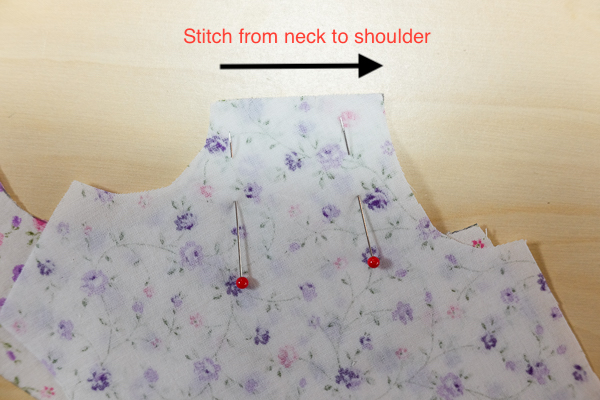 2. Sew the shoulder seam, beginning at the neck edge and going toward the arm hold opening. This is "sewing with the grain, important for keeping seams straight.
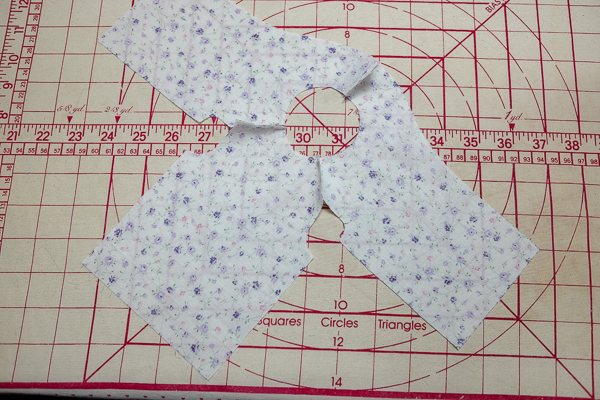 3. Sew both shoulder seams and the seam in the back of the extension for the front.
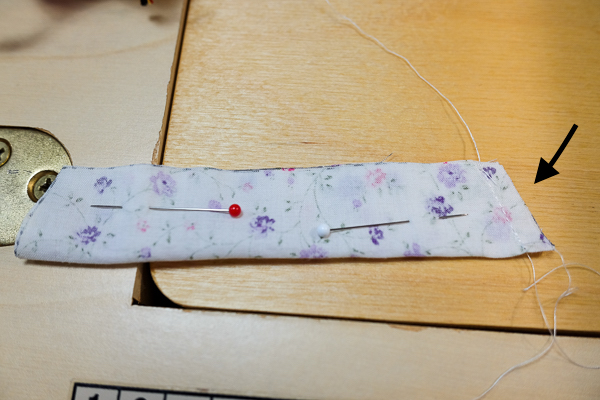 4. Sew the outer edges, on both sides of the collar.
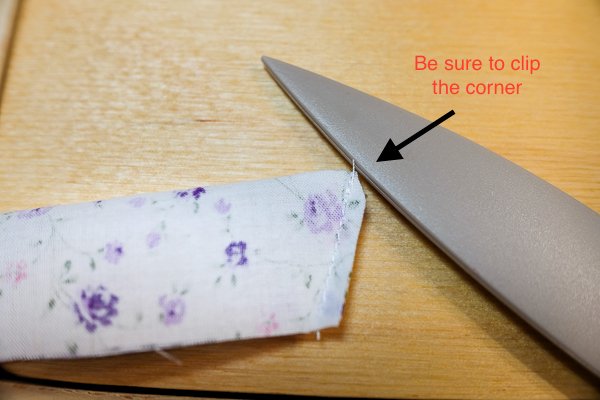 5. Trim the collar seams to about 1/8-inch and clip the corner. This will make the collar easier to turn and neater too!
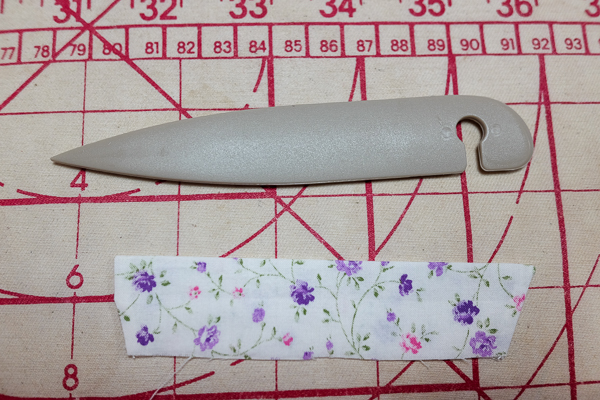 6. The finished collar. Use a point turner (shown above) to turn a neat corner. Press the collar flat.
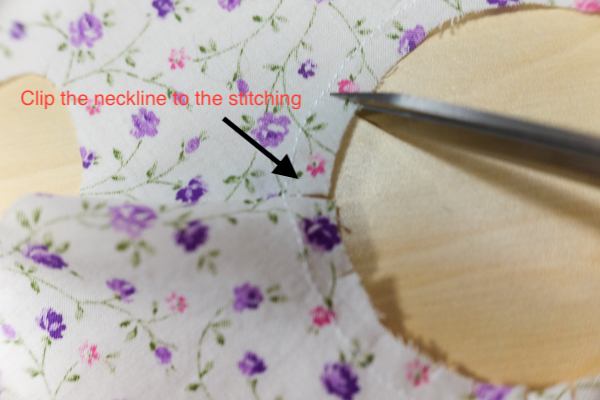 7. Sew a line of regular stitching 1/4-inch along the collar. Carefully clip along the neck edge without clipping through the stitching. Doing this will make the collar easier to attach. This will be your stitching guide to sew in the collar.
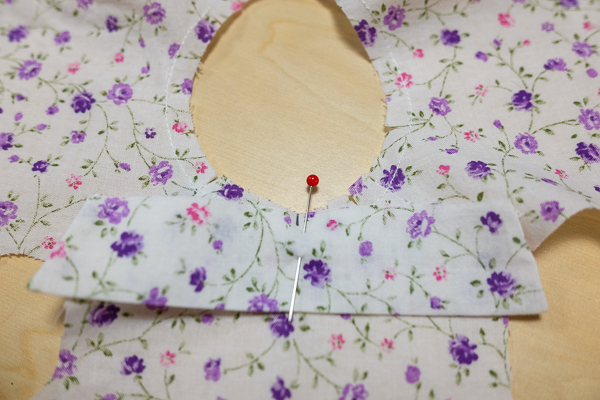 8. Fold the collar and the back in half to make a crease mark - this marks the centre of the back. Match them up and pin.
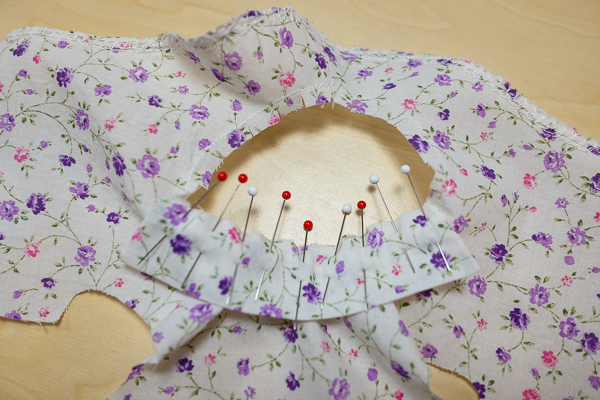 9. Pin the collar to the back of the pyjama top, collar bottom against the right side of the back. Hand baste in place.
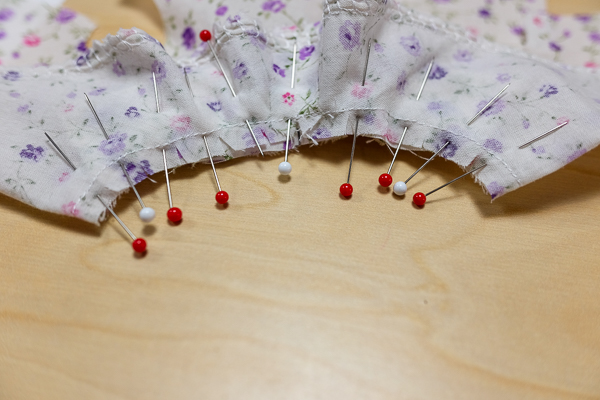 10. Fold the front facing extension over the back, sandwiching the collar in-between. Stitch it all together, following the line of stitching you put in originally as a guide.
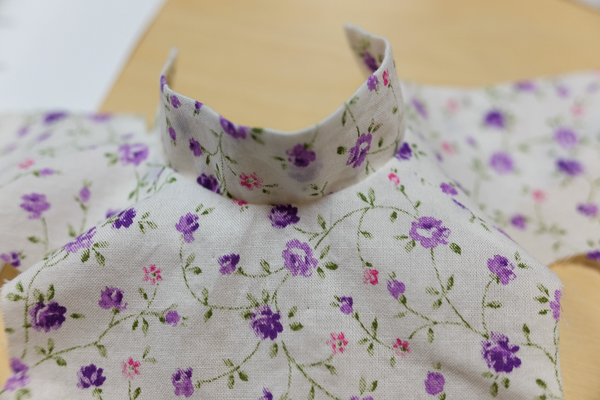 11. Here is the finished collar. Press everything well!
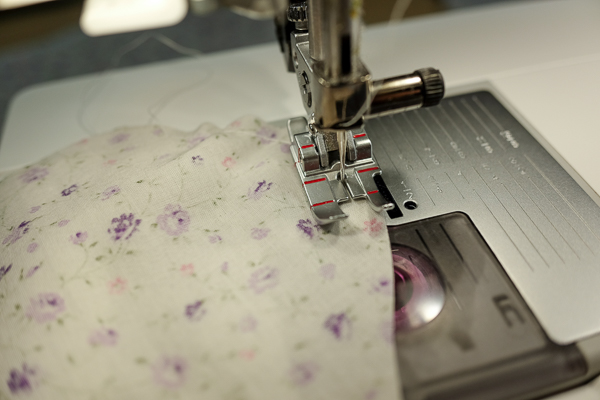 12. Using the sewing machine, run a line of basting 1/4-inch in from the edge along the top of the sleeve. Leave the thread tails long. You will using this basting to ease in the sleeve to the body.
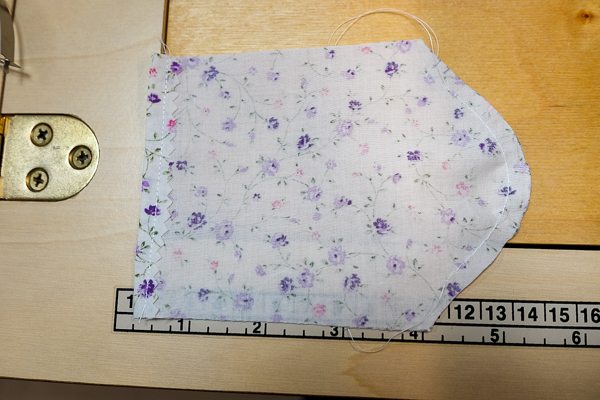 13. The completed basting on the sleeve.
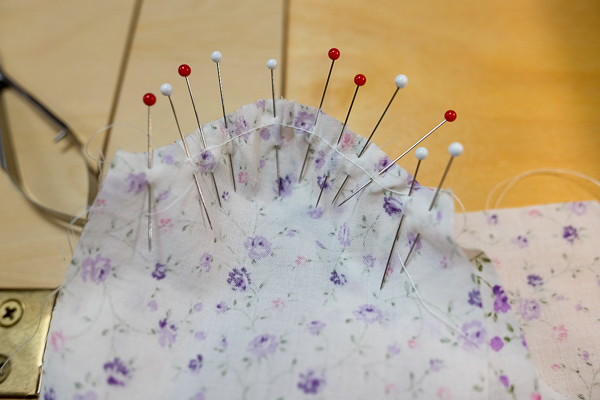 14. Pin the sleeve to the garment top, right sides together. Ease in the sleeve by pulling on the basting thread tails until it fits. Baste in place, if needed.
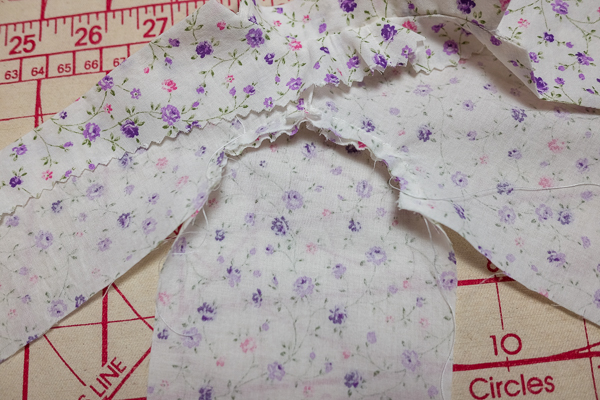 15. The sleeve is sewn in. I hand sewed it in place with a "combination stitch" - 3 small running stitches and then 1 back stitch. This stitch makes a very strong seam!
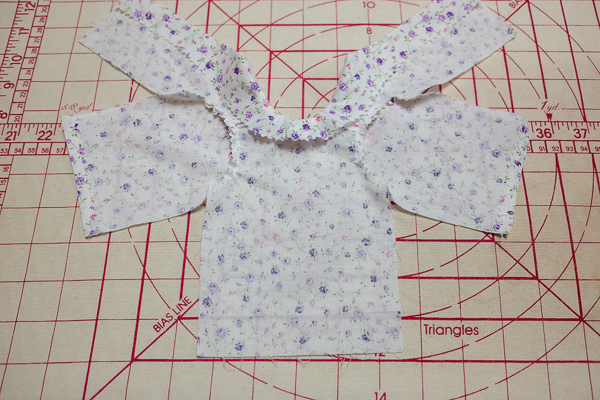 16. Both sleeves are sewn in, using a hand stitch called a "combination stitch". Do not press the sleeves! Just finger press the seam allowance toward the inside of the sleeve. Finish the sleeve cuffs - turn in and stitch down.
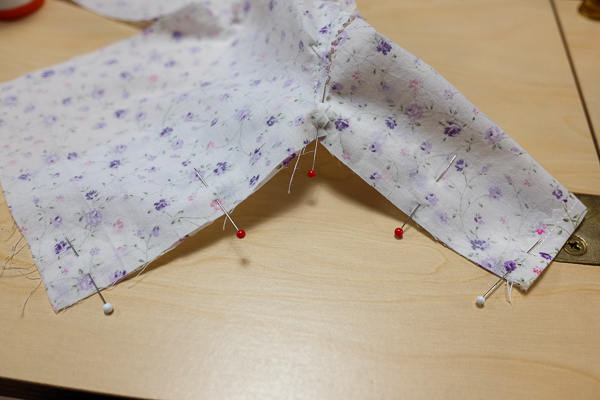 Pin and sew the side seams of the pyjama top. Continue stitching along the sleeve edge too, sewing the side and the sleeve seam all in one pass.
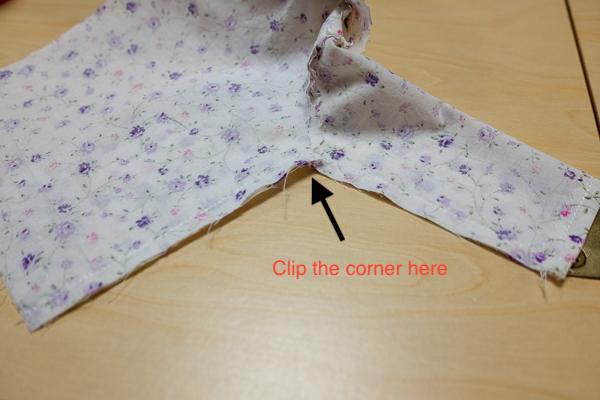 Be sure to clip the corner of the side seam, in the underarm, after you sew it. This helps to keep it from bunching up when Pru moves her arms.
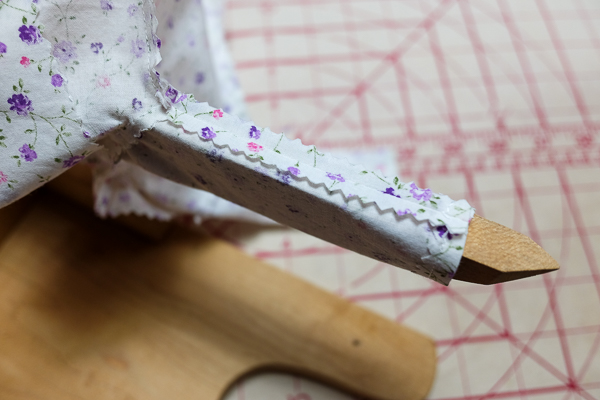 After stitching, press the sleeve seam using something very slim that will fit in the sleeve. I am using one of the "arms" on my tailors board, which just fits in these tiny places.
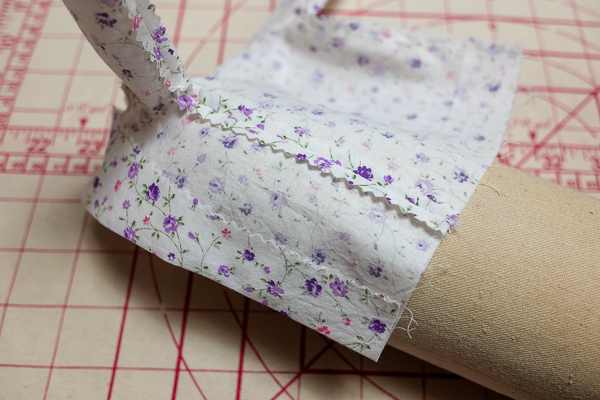 Press the pyjama top side seam open too. You have a bit more room here, so I am using a seam roll.
Continue on to Page 2, for Part Two of the Pyjama Sewing Tutorial: The Pyjama Pants -->
Return to the Doll Sewing Tutorial page -->
Return to the Home Page -->